|
QUICK LINKS : |
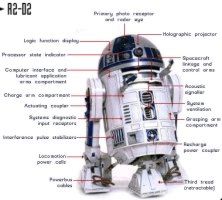
| R2´s Tools and Sensors | |
| Other R-Series Droids | |
| Other R-Series Droids in the Movies | |
| R2-D2´s Story |
When George Lucas created the StarWars saga, he wanted to have a comedian element in the movie to provide a means of relief after especially unnerving scenes. He thought about a duo like Stan Laurel/ Oliver Hardy, and to make these more fitting to the planned ultra-futuristic setting, he decided to go with two robotlike, mechanical characters, called droids. One of them was supposed to be a tall human shaped golden robot, while the other was intended to be a small, quite unusually shaped machine on three legs.
I have compiled the following reference pictures from all six movies. The photos were taken as screenshots from the DVD. Please klick on the thumbnails to get to a high-res version.
| DOME | ||
| 1 | "All-Arms-Out" - sequence from ROTJ. This was still done with mechanical effects on the set. Some of the arms used here are pictured in the Visual Dictionary. |  |
| 2 | And another "All-Arms" - sequence from Episode 3. Most of these seem to be CGI. | 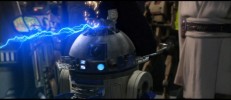 |
| 3 | A holographic projector (HP) shining out of the moveable little "eye" lens below and to the right of the single large blue-rimmed radar eye. | 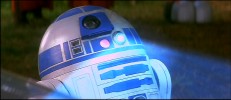 |
| 4 | A very, very, very long arm extending from an undetermined position on the head to do repairs on the engines of Luke´s X-Wing. This arm is way too long to fit inside the head, and there are no telescoping points visible. | 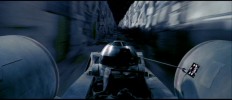 |
| 5 | A radar dish , used as a lifeform sensor, mounted in one of the six flaps at the top of the dome. | 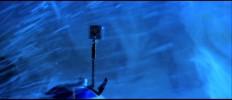 |
| 6 | A data exchange port at the bottom of the large blue-rimmed eye at the front of his head. It is here that Leia inserts her data of the Death Star in ANH. | 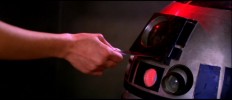 |
| 7 | A telescoping drink dispenser shown on Jabba´s barge in "Return of the Jedi". This is very large and we don´t see how this mechanism extends or retracts. It would take up most of the space in R2´s head, and it would conflict with the lasersword-mechanism. | 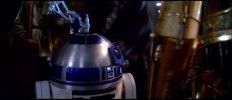 |
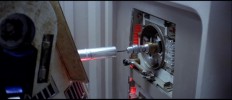
| 8 | A lightsaber-popping mechanism that shoots Luke´s lightsaber several dozen meters into the air. The hatch slides inwards and towards the top of R2´s head, then the lightsword rises into firing position. | 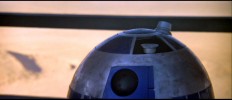 |
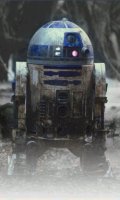
| 9 | After R2 was submersed in mud on Dagobah, he spits out that mud out of the same hatch that the ligthsaber pops out from. Is this supposed to be the one that the periscope comes out from? |  |
| 10 | LDI´s - "Logic Display Indicators" - Two sparkling lights at the front and one wide one at the back of the head. | 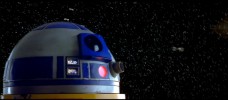 |
| 11 | PSI´s - "Processor State Indicators" - A flashing light at the front that changes from red to blue and back at a rate of about once a second, and another flashing light like the one at the front, but it alternates from yellow to green. | 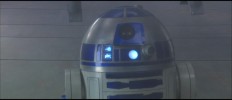 |
| 12 | A fire extinguisher that seems to be postioned in the front of the head; below and right of his blue eye. | 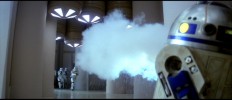 |
| 13 | A periscope extendable from R2´s head. There´s no hint in the movies behind which panel on the dome this is hidden. On the Applause R2 with periscope head, it is situated in the same panel as the pop-out lightsaber. |  |
| 14 | Electric arc zapper situated in the dome, in the same hatch as the lightsaber in ROTJ. The pie panel swings out in this instance, however. | 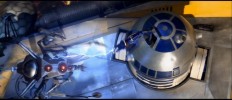 |
| BODY - ARMS AND GRASPING DEVICES | ||
| 15 | Two blue arms at the front with grasping claws. With the anti-magic of CGI we later see these arms to be extendable in Episode 3. |  |
| 16 | A computer terminal arm for access to any network. It is situated in the right vertical door on R2´s front. In ANH this arm is mounted at the top end of the door and swings upwards and out. In ESB however, this arm is mounted at the bottom of the right hand door and swings downward and out (during R2´s second attempt to plug into the Cloud City computer.). In Episode 2 again, the arm seems to be placed in the middle...... | 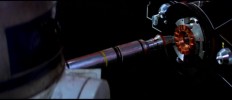 |
 |
||
| 17 | A grasping arm in the left vertical door. You can see this at the end of ESB when R2 tweaks the Falcon´s hyperdrive back to work. This arm was also used in Episode 1 for tweaking Anakin´s podracer, but there it was situated in the right front bay. | 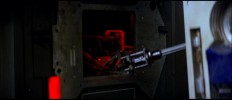 |
| 18 | A probable goof of the prop department: This "computer arm" is deployed by R2 in ESB at Cloud City when tries to connect to the city´s computer for the first time and gets fried in the process because he mistakenly tries on a power plug. The arm looks exactly like the one before (at No. 17) but it is situated in the right hand vertical door. It is mounted at the top of the door and extends upwards and out. | 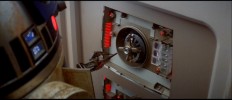 |
| 19 | A more simple-looking grasping arm in the left-hand side front door. R2 uses this to wrestle with Yoda. Later, he seems to hold a welding tool with this arm. This arm also seems to have been used for the repair on the outside hull of the Royal Starship in Epsisode 1, with a lower position in the bay, however. |  |
| 20 | A rather different-looking arm in the left front door R2 uses in ANH for manipulating the hologame in the Millenium Falcon. |  |
| 21 | A welding tool R2 uses for welding on Luke´s X-Wing on Dagobah in ROTJ. This may or may not be on the same arm as No. 20 |  |
| 22 | Very long arm with very long "fingers", used in Episode 2 in the arena to reassemble C-3PO. Situated in the left front bay, pivoting at the middle (!) of the bay. | |
| 23 | Arm with three "polydigital graspers", used in the interstellar liner in Episode 2. Situated in the bay where´s also the circular saw. There´s also another of those impossibly long (CG) arms originating from the left front bay, pivoting at the top. | |
| BODY - OTHER DEVICES | ||
| 24 | A power plug to recharge R2-D2´s power cells is situated in the little horizontal door above the six "switches" at R2´s right front. Here Luke recharges R2 after their arrival on Dagobah. | 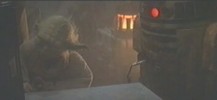 |
| 25 | The same door contains an electrical arc zapper to cut chains and repell nasty Ewoks. | 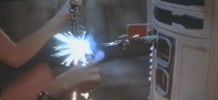 |
| 26 | A circular saw is hidden retractable behind the larger door at R2´s left front. | 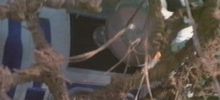 |
| 27 | Grasping device at R2´s backside, used in Episode 2 to pull C-3PO´s head off the battlefield in the Geonosian arena. R2 seems to have used that later in ESB, because he managed to pull the dismantled C-3PO off the landing platform while rolling forward. | picture coming soon.... |
| 28 | The rocket engines R2 uses in the deleted scene on Coruscant, when he falls over the edge of the landing platform. | 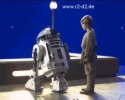 |
| 29 | The rocket engines R2 uses in Episode 2 to fly through the droid plant | |
| 30 | An oil-dispenser, R2 uses in Episode 3 to overpower the Super Battledroids. | |
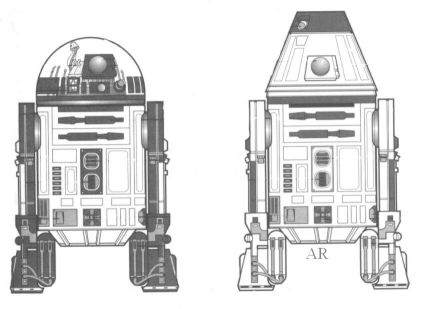
Of course, R2-D2 is just one out of several series that together probably make up millions of droids. In his case, "R2" is the series designation. Besides the R2-series, the R5-series has been known for years, because the droid from ANH with the "bad motivator" had been identified in several sources as R5-D4. By now, a number of other R-series droids are known. The following drawings are taken from Ballantine Books "Essential Guide to Droids". Though they are not very accurate in some respects, they can help in a general comparison.
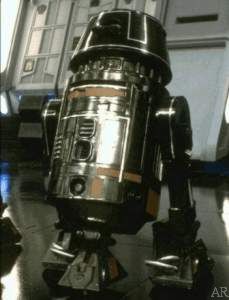
| It all started with the P2-series, which was the predecessor of the R-series. It had to be discontinued due to some lawsuit. IA came up with the R1-series, which used black shells from recycled MarkII reactor domes. They were huge and had no resemblance to their later sucessors, the R2 series. One R1 (R1-G4 actually) can be seen in the droid auction sequence at the beginning of ANH. They had just enough memory capacity to calculate a single set of hyperspace jump coordinates. | 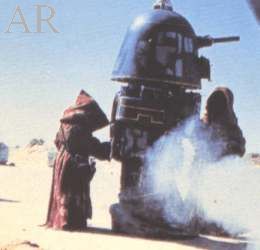 |
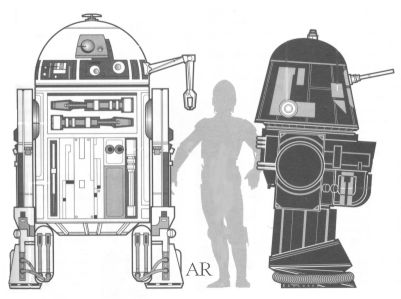 |
| This disadvantage was corrected in the R2 series, which were able to store 10 sets of jump coordinates. They were also much smaller and agile. |  |
 |
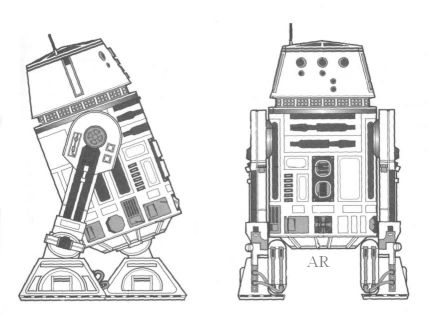
| The R2 series was continued with the R3 series, a special version intended for gunnery calculations. They had a more precise computer, but at the cost of storage space for jump coordinates. They only can record 5 sets of them. One can easily spot an R3 droid because of it´s CLEAR head dome. | 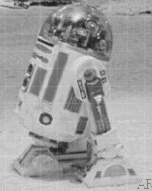 |
 |
| The next member in the family was the R4 series, a more simple model for the private market. It only stores one set of hyperspace coordinates. It is recognizable by the high round-to-square head. | 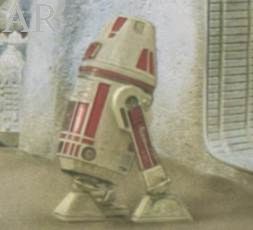 |
|
| Their sucessors, the R5 series, was IA´s only failure. Intended to be even more affordable than the R4 series, it became too cheap, it lacks the R2´s versatility and the R4´s reliability. It only stores one set of jump coordinates. (Some rebels have modified their R5´s to store 10 sets of coordinates. Wedge Antilles for example used R5-D2 in the Battle of Borleias. Due to his constant shrieking, R5 was memory-wiped and renamed R5-G8.) | 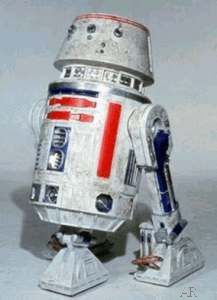 |
 |
| The next step in the evolution of the R-series was (logically) the R6 series. It was less expensive, yet it could store 12 sets of jump coordinates. It became soon very popular. | No stills available, because these were not in the movie. ILM thought about putting them into Episodes 1 to 3, but decided against it. | 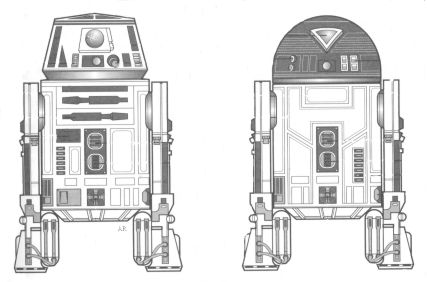 |
| The last model so far was the R7 series, which was especially produced for the new E-wing starfighter of the New Republic Forces. It stored 15 sets of jump coordinates and was protected against ion blasts. |
The [time] denotes approximate hours:minutes into the movie counting from the start of the Centfox fanfare. This will vary greatly due to the version of video you use !
Episode 1: THE PHANTOM MENACE |
||
| [27:06 min] | 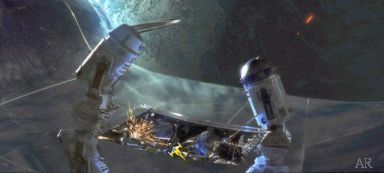 |
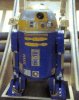
Very first appearance of R2-droids in the movies aboard Queen Amidala´s Royal starship. Together with R2-D2, three other astrodroids are sent outboard to effect repairs. A red R2-unit gets blasted away first, followed closely by R2-B1, a blue-golden droid. The third one, G8-R3, a droid who is assembled from an R2 body and an R5 series head, gets shot into thousand pieces shortly afterwards. |
 |
||
 |
 |
|
 |
Besides. there´s a blooper in this scene. When R2 bumps into JarJar, there´s another R2 unit in the elevator in the background with a paintscheme very similiar to R2-D2. Since the two other R2´s here look rather different, it must be R2-D2 in the same shot twice ! | |
| [57:20 min] | 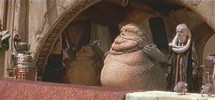 |
A red-coloured R5 series can be seen behind Jabba the Hut when he makes his appearance in the Podracing stadium. |
| Yellow-coloured R2s in several of the Naboo fighters | ||
| A red-coloured R2 that was probably used in the Naboo hangar set. This photo is from the web documentary. | ||
| A yellow-coloured R2 seen in the background in Watto´s shop.This photo is from the web documentary. Note the vise in the foreground that was made on the planet "England". | ||
Episode 2 : ATTACK OF THE CLONES |
||
| A green-coloured R2 seen briefly on the landing platform on Coruscant, before being destroyed by the explosion of the Naboo starship. | ||
| Rdings (R4M19?), the droid in Obi-Wan´s jedi starfighter | ||
Episde 3: REVENGE OF THE SITH |
||
| Rdings again, here being beheaded by a nasty bunch of buzz droids. The dome that is pulled away is one of the R2 builder´s club´s R&J domes..... | ||
Episde 4: A NEW HOPE |
||
| [4 min] | 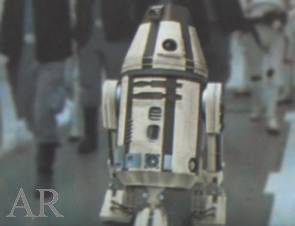 |
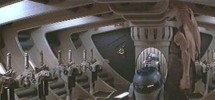
Rebel prisoners are led off by stormtroopers. The droid is labeled R4-M9 by Decipher and BTM. White body and head, but with dark olive drab vertical stripes along both; olive top of head |
 |
Same sequence. R2-series droid with a white/light grey body, vertically alternated. The lower half of the head is also light grey; the top half is coloured white with one black horizontal stripe. Legs are grey. | |
| [13 min] | 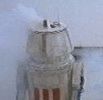 |
Robot auction. R5-D4 on sale. Baaaad motivator.......White body with red vertical doors, blue leg details. |
| [40 min] | 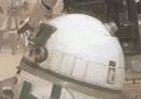 |
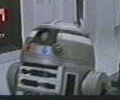
Mos Eisley checkpoint. A white R2 crosses the lower frame with a black "eye" detail and red arms at the front. This R2 has been replaced by a digital Ronto in the Special Edition of ANH. |
| [40 min] | 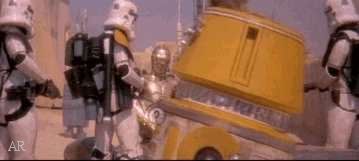 |
Same sequence. A R5-series droid with a yellow head, white body with yellow details and arms. |
| [41 min] | 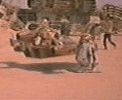 |
Arrival at the cantina. A white R2 with an orange-red dome with white areas crosses the picture. This is supposed to be called R5-A2, althought the name doesn´t really make sense. |
| [44 min] | 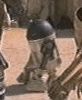 |
The droids wait outside. A white R2 with a dark grey head and probably grey leg details passes by. |
| [48 min] | |
Streets of Mos Eisley. White R4, labeled R4-E1 by Decipher and BTM. Has the round-to-square-head, red leg details and body doors. Belongs to BoShek, the Corellian pilot who introduced Chewbacca to Obi-Wan. |
| [1h: 11 min] | 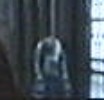 |
Obi_wan alone in the Death Star. Imperial R3 in the background. The round head is made of clear material with a lot of detail inside. The body is medium blue with light grey doors at the back. |
| [1h: 32 min] |  |
Rebel briefing. R2-model, called R2-X2 in BTM, with a dark green body, white head dome with two small horizontal stripes. Black "eye" detail. This R2 is loaded into the X-Wing of Red10 at [1h: 35 min] |
| [1h: 32 min] |  |
Same sequence. R5-unit with a mostly white body (not much more to see of him) |
| R5-unit witha black-and-red paint scheme. This is later seen in the X-Wing of Red Leader. | ||
| [1h: 39 min] |  |
In the Death Star. White Imperial R3 with red doors and leg details. Also has the clear head dome. |
Episode 5: THE EMPIRE STRIKES BACK |
||
| [5 min] | 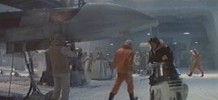 |
Han enters the Rebel Hangar. A R5-series droid with white body, apparently black head and vertical doors. Black leg details. The lower front arm is painted grey. |
| Same sequence. A yellow-coloured R3 droid with a clear dome. | ||
| [5 min] | 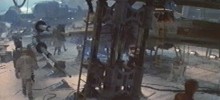 |
Same sequence. R2-droid with white body, red head with white details; red door on rear side of body. |
| Han talks to Chewie on the Falcon. A yellow R2 in the background. The body looks exaclty like the yellow R3 mentioned before. | ||
| [24 min] |  |
Rebels man their speeders. Only the head of an R2.series droid is visible. The head is either clear or of a very bright chrome colour. |
Episode 6: RETURN OF THE JEDI |
||
| [45 min] | 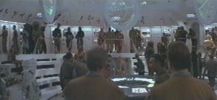 |
Rebel briefing. A R3-model with white body; clear dome with reddish details inside; red leg details. |
| [45 min] | Same sequence. R5-droid with white body and blue leg details. The head has a peculiar paint scheme of four black chevrons on a white base. | |
 |
There are several black R4´s and R5´s visible in the different Death Star hangar sequences. | |
The definite origin of our favourite astrodroid remains a mystery even after Episode 1.
The "official" source of Artoo´s origins (at least for the time being) is taken from the StarWars Sourcebook, published by West End Games, 1987 :
|
 please click to enlarge this picture from the "Behind the Magic"-CD
 |
After these "birth" notes, we know nothing of
what happened to Artoo for a long time. There are the episodes,
however, of the TV cartoon series DROIDS that starred R2 and C-3PO.
Together with the DROIDS TV series a comic series
was published by Marvel Comics. Issue #1 (shown here) started on April
1st, 1986. It was rather aimed at the younger audience. The writers did
have orders, of course, not to reveal any meaningful details of the
droids´ past. 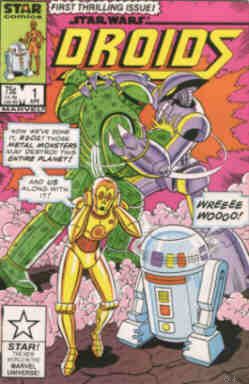
R2-D2´s first appearance as a true astromech droid belonging to the household of Queen Amidala of Naboo and is at the moment assigned to the droid labour pool aboard her Royal Starship. During the breakthrough of the Trade Federation´s blockade, he proves to be very courageous (and pretty lucky, methinks), which brings him a free cleaning from the hands of Maid Padme/ Queen Amidala. Later on Tatooine, he meets C-3PO for the first time, who is still rather unfinished. After the fateful podrace, the two are seperated again for the moment, only to meet again in Episode 2. R2 helps in destroying the battle droid command ship above Naboo.
R2 accompanies Senator Amidala to Coruscant, only to become witness of the bomb atack on her ship (and the destruction of a fellow Astromech). Later, he flies with Amidala and Anakin Skywalker to Naboo, and from there to Tatooine. R2 meets C-3PO again, who has by now gotten a skin, although not a golden one. After a message from Obi-Wan they fly to Geonosis to help Anakin´s master. On Geonosis R2 rescues the Senator from a fiery death in a melting pot by flying to the melting control station using his anti-gravitiy thrusters. And he saves C-3PO by retrieving 3PO´s head in the arena.
R2 helps Anakin Skywalker to rescue Chancellor Palpatine from General Grievious´ flagship. After that he´s present at much of the action, but doesn´t play much of a role. At the end, he´s with the soon-to-be rebels on the Royal Alderaanian Envoy ship Tantive IV.
The next time R2 is mentioned is in the "Star Wars radio drama", broadcasted at the time by National Public Radio and today available on CD. We learn to know a lot of the dramatic events right before "A New Hope":
After a rebel group under the command of Bail Organa, Leia´s stepfather, managed to ambush an Imperial convoy transporting the plans of the almost finished Death Star, Leia hurries aboard the Tantive IV to meet the rebel group and take the plans over from them to deliver them to Alderaan. Aboard this vessel are two droids named R2-D2 and C-3PO, who belong to the ship´s captain called Antilles (Wedge´s father), yet due to a shortage of duties the robots are temporarily assigned to the ship´s droid labour pool, to do very low-grade work. Just when they are about to receive the Death Star plans by radio transmission, the Tantive IV is intercepted by the Imperial Star Destroyer Devastator. To give a cover story for their presence, R2-D2 is sent out into space and pretends there to do extravehicular repairs. Due to this diversion the Tantive IV manages to escape with the stolen plans into hyperspace. They emerge from hyperspace close to a backwater planet called Tatooine, seemingly in safety. But obviously some traitor (according to BTM it was the protocoll droid U-3PO, who is shortly seen on screen behind C-3PO just at the beginning of this sequence) has placed a homing device aboard the Tantive IV blockade runner, because the Devastator is right on their heels. The larger vessel manages to hit the rebel ship and draws it into its docking bay. But Leia succeeds in placing the stolen plans and a message for a certain General Kenobi in R2´s memory banks and sents him down to the surface of the planet Tatooine. The rest is movie history......
R2 takes his droid friend C-3PO and flees in an escape pod. They are both taken prisoner by the Jawa people and later by a wonderful coincidence sold to a certain Owen Lars, who happens to be the uncle of Luke Skywalker. Luke finds a message in R2´s memory banks for General Kenobi. After Luke´s relatives are murdered by Stormtroopers chasing the Death Star plans, Luke meets Obi-Wan Kenobi and takes the droids to Mos Eisley in hope of finding a ship to leave the planet. They escape in Han Solo´s Millenium Falcon, only to be drawn into the Death Star that is still hovering among the remains of the planet Alderaan, their intended destination. With R2´s help they succed in freeing the Princess and leaving the Death Star again, although without Obi-Wan, who sacrifies himself to allow Luke to escape. They flee to the Rebel Hideout on the fourth moon of Yavin. The rebels mount an attack on a weak spot of the Death Star. Luke flies with them, using R2-D2 as his astrodroid. Together, they succeed in destroying the Deatth Star only seconds before the anniliation of the rebel base.
After the victory at Yavin, the rebels hide on the ice planet of Hoth. After a probe droid discovers them, they are forced to flee. Luke takes R2 along in his X-Wing, but they don´t folow the rebels to their rendezvous-point; instead flying to the uncharted planet Dagobah, where Luke wants to find Yoda, the Jedi Master. R2 brings himself into trouble several times. Luke senses his friends are in danger, and although Yoda warns him not to go, he leaves Dagobah with an unfinished training. On Cloud City over the planet Bespin, Luke confronts Darth Vader, while R2 meets up again with Lando Calrissian, the Princess and C-3PO. R2-D2 enables them to escape by opening the doors, spraying a fog from his fire extinguisher to hide his friends, and by finally repairing the deactivated hyperdrive in the Millenium Falcon.
Luke sends C-3PO and R2-D2 into Jabba the Hutt´s fortress, where Han Solo is held frozen into carbonite. Not knowing that he took a troian horse into his palace, Jabba takes them prisoner. When the rebels are supposed to be thrown into the pit monster of Carcoon, R2 shoots Luke´s lightsaber into his hands, and the friends manage to kill Jabba and escape. During the attack on the second Death Star, R2 and 3PO accompany the Princess, Luke and Han to the surface of the moon of Endor. Here, R2 makes some Ewok friends, otherwise he takes no big role in the destruction of the Death Star this time.
Home I Character I The Prop I Startours I My R2 I My R2´s Appearances I Other R2´s I Links/Credits I FAQ´s I Impressum I Datenschutz